↑
「OK」をクリックするとインストーラを起動します。
作成開始 : 平成19年03月31日(土) 最終更新 : 平成19年03月31日(土)
apache2.0.59とphp4.4.6を試してみた。
1.Apache2のインストール
(1)ソフトのダウンロード(apache_2.0.59-win32-x86-no_ssl.msi)
JAPAN APACHE USERS GROUP -> ダウンロード といくとダウンロード・サイトの選択があります。
私は HTTPでダウンロードのうち 明星大学 を選択しました。そうするとディレクトリ・インデックスを表示しますので、bainares -> win32 とたどり apache_2.0.59-win32-x86-no_ssl.msi を選択し任意のフォルダにダウンロードしました。
(2)インストール
スタート -> ファイル名を指定して実行 -> 参照で apache_2.0.59-win32-x86-no_ssl.msi を選択します。
↑
「OK」をクリックするとインストーラを起動します。
↑
「Next」をクリックします。
↑
「I accept the terms in the licence agreement」をチェックし「Next」をクリックします。
↑
「Next」をクリックします。
↑
上記のように適宜入力します。これらが httpd.conf に反映されます。「Next」をクリックします。
↑
とりあえず「標準インストール」としていて「Next」をクリックします。
↑
「Next」をクリックします。フォルダを変えたい時は「Change...」で変更します。
↑
「Install」をクリックします。インストールが始まります。
↑
この過程でコマンドプロンプト窓が開きサービス起動します。
↑
「Finish」をクリックします。WindowsXPの場合はセキュリテイ警告が出ますので「実行を許可」します。
プログラムメニューにApacheが登録されタスクバーにがあります。緑なので起動中ですね。
ここで http://localhost/ としてみます。すると!
↑
こんなの表示したらOKです。
2.PHP4のインストール
(1)ソフトのダウンロード(php-4.4.6-Win32.zip)
PHP: Hypertext Preprocessor -> PHP: Downloads -> Windows Binariesのうち「PHP 4.4.6 zip package [8,393Kb] - 01 Mar 2007」 をクリックすると ダウンロード・サイトの選択になるので「Japan」の「jp.php.net」か「jp2.php.net」をクリックします。php-4.4.6-Win32.zip のダウンロードを開始します。
ダウンロードしたファイルをzip解凍ツールで解凍します。(WindowsXPだとダブルクリックで一発展開)
すると次のようなフォルダに展開されます。
(2)インストール
念のためApacheは停止しておきましょう。タスクバーのになります。
インストーラではないので、次の手順で設定していきます。
a.上記の php-4.4.6-win32 を php に変更し C:\ 直下に移動します。(保存しておきたい方はコピーしてください)
b.C:\php にある php.ini-dist を php.ini に変更します。そして、C:\WINNT (WindowsXPではC:\WINDOWS)へコピーします。
c.C:\php にある php4ts.dll を C:\WINNT\system32 (WindowsXPではC:\WINDOWS\system32)へコピーします。
(3)Windows用にphpの設定
デフォルト(最初)の設定のままだとうまく日本語が使えないことがあるので設定します。
設定ファイルは C:\WINNT\php.ini (WindowsXPではC:\WINDOWS\php.ini)です。
エディタで同ファイルを設定します。
直接、該当個所を変更してもよいのですが、私はどこをどう直したか残したいので、リマーク・追加してます。
気に食わない方は、同じ項目の「;」記述文(リマーク)を削除してもよいでしょう。
a,magic_quotes_gpc を修正します。(赤はリマーク、緑は追加です)
; Magic quotes for incoming GET/POST/Cookie data.
;magic_quotes_gpc = On
magic_quotes_gpc = Off
b.文字コードを修正します。(緑は追加です)
; PHP's built-in default is text/html
default_mimetype = "text/html"
;default_charset = "iso-8859-1"
default_charset = "Shift_JIS"
c.PHPの拡張関係のディレクトリを設定します。(赤はリマーク、緑は追加です)
; Directory in which the loadable extensions (modules) reside.
;extension_dir = "./"
extension_dir = "C:/php/extensions"
d.マルチバイト(日本語など)が使えるように設定します。(緑は追加です)
;Windows Extensions
;Note that MySQL and ODBC support is now built in, so no dll is needed for it.
;
;extension=php_mbstring.dll
extension=php_mbstring.dll
;extension=php_bz2.dll
;extension=php_cpdf.dll
;extension=php_crack.dll
↓
まだ下にいっぱいあります
e.マルチバイトを利用する際は【日本語】であると設定します。
[mbstring]
; language for internal character representation.
;mbstring.language = Japanese
mbstring.language = Japanese
; internal/script encoding.
; Some encoding cannot work as internal encoding.
; (e.g. SJIS, BIG5, ISO-2022-*)
;mbstring.internal_encoding = EUC-JP
mbstring.internal_encoding = SJIS
; http input encoding.
;mbstring.http_input = auto
mbstring.http_input = auto
; http output encoding. mb_output_handler must be
; registered as output buffer to function
;mbstring.http_output = SJIS
mbstring.http_output = SJIS
; enable automatic encoding translation according to
; mbstring.internal_encoding setting. Input chars are
; converted to internal encoding by setting this to On.
; Note: Do _not_ use automatic encoding translation for
; portable libs/applications.
;mbstring.encoding_translation = Off
mbstring.encoding_translation = On
; automatic encoding detection order.
; auto means
;mbstring.detect_order = auto
mbstring.detect_order = auto
; substitute_character used when character cannot be converted
; one from another
;mbstring.substitute_character = none;
mbstring.substitute_character = none;
3.ApacheとPHPの連携確認
(1)Apacheのhttpd.confを変更しましょう。
DocumentRootを変更しましょう。
これは、ディフォルトではあまりに階層深いし、フォルダ名に半角スペースが入っているためです。
そして、Apacheを Start もしくは Restart します。
DocumentRootにindex.htmlを作成し、http://localhost/と入力し期待どおりに表示されることを確認します。
次にApacheでPHPを使うための設定を httpd.conf に記述します。Apacheは停止しておきましょう。
[以下の個所を追加です。]
#LoadModule usertrack_module
modules/mod_usertrack.so

#LoadModule vhost_alias_module
modules/mod_vhost_alias.so

#LoadModule ssl_module
modules/mod_ssl.so

LoadModule php4_module
"C:/php/sapi/php4apache2.dll"

.

.

.

# The index.html.var
file (a type-map) is used to deliver content-

# negotiated documents. The
MultiViews Option can be used for the

# same purpose, but it is much
slower.

#

DirectoryIndex index.html index.htm index.cgi index.php

.

.

.

#AddType text/html
.shtml

#AddOutputFilter INCLUDES .shtml


AddType
application/x-httpd-php .php

AddType application/x-httpd-php-source
.phps
そして、Apacheを Start もしくは Restart します。
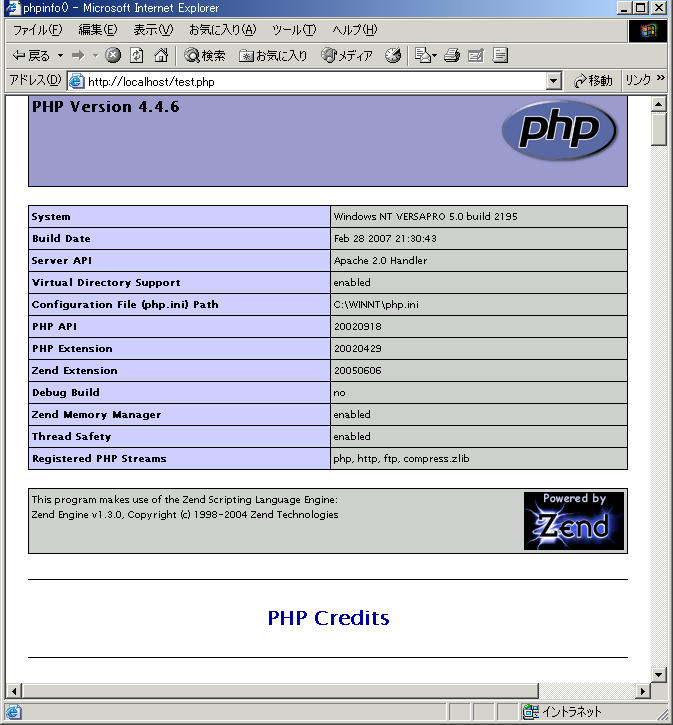
(2)DocumentRootに下の文を書いたファイルをtest.phpで保存し http://localhost/test.php 実行しましょう。
<?php
phpinfo();
?>
これ表示したらOKです。
【戻る】
![]()